
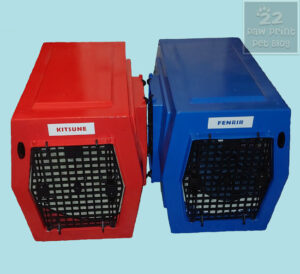
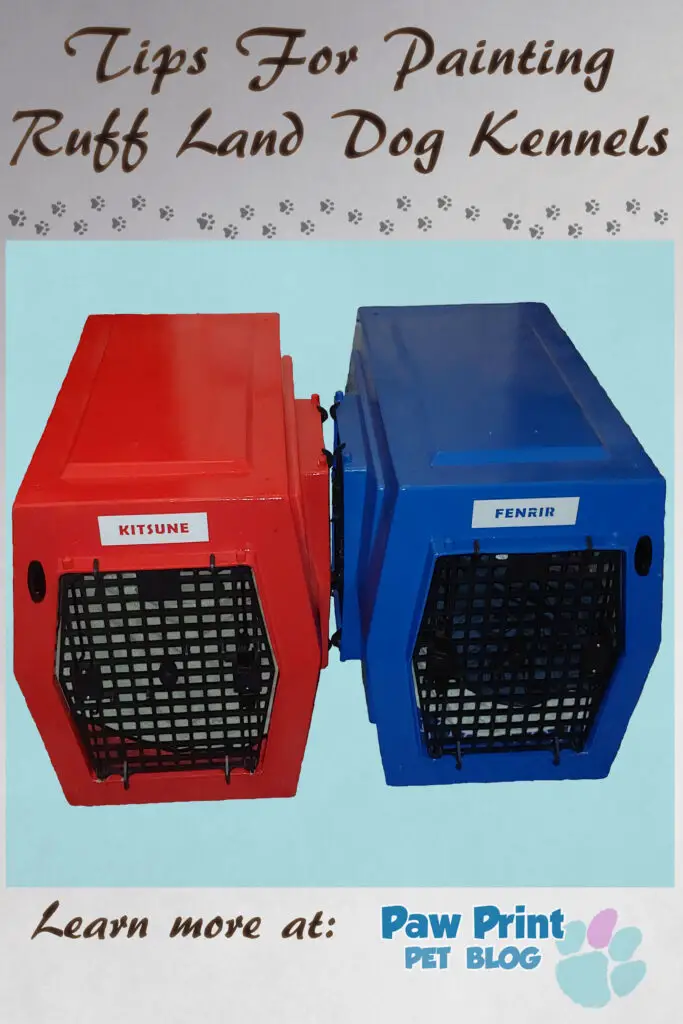
Ruff Land is known for occasionally releasing limited edition, uniquely colored kennels. While the specialty colors are popular, they are only offered for short periods of time. They are often harder to get, and, so far, Ruff Land has only released a handful of unique colors. I really wanted Kit and Fen to have crates in “their” colors – red and blue! Time to get creative! This post is about how I went about painting our Ruff Land dog crates, how they turned out, and how they’ve held up over the past couple of years!
Just a warning, this post is a bit longer than usual, and will be picture heavy! I spray painted Kitsune’s crate, the red one, in August of 2020. Fenrir’s crate, the blue one, was painted later, in April of 2021. This post contains affiliate Amazon links. If you click on one of our links and make a purchase, we will receive a small commission at no additional cost to you. Thank you for your support!
Post Contents:
First Things First – Research
While I really wanted our crates to turn out as nice looking as possible, my dogs’ safety came first! I decided that spray painting our Ruff Land crates would probably be the easiest way to paint them. While researching, some people suggested I use Plasti-dip rather than spray paint. Plasti-dip is a PVC based paint that’s commonly used to temporarily color cars. A big reason why car enthusiasts like Plasti-dip is because it can be easily peeled off, making it easy to temporarily change the color of your car without damaging the original paint underneath. But for my project, I was specifically looking for something that, ideally, wouldn’t peel!
Once I decided that spray-painting was the route I wanted to go, I had to decide what brand of paint to try. Once again, using something that would be safe for my dogs was the most important factor here!
After lots of research, I ended up going with the spray paint brand “Rust-Oleum”. While researching, I came across some information about bird owners using Rust-Oleum spray paint on their bird’s cages. Birds, for those that don’t know, are very, very sensitive to fumes from products such as paints. I figured if Rust-Oleum was bird safe, I was probably on the right track to finding something dog safe. Rust-Oleum paints are non-toxic once dry. They are also unleaded.
Gathering My Supplies
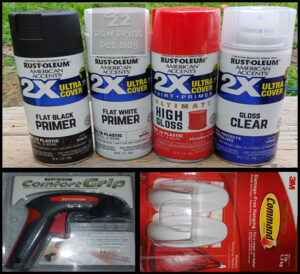 I ended up purchasing Rust-Oleum primer (I used white for the crates), the colored paints I wanted to use, and a clear gloss top coat. For each of our large Ruff Land kennels, I ended up buying a single can of primer and top coat, plus two cans each of the red and blue colors.
I also purchased a two pack of Command hooks. Because I didn’t realize that Command hooks come in colors other than white, I used black Rust-Oleum primer to spray paint mine black. This next item, in my opinion, is really important! Especially if you’re going to paint larger crates, you’re really going to want to get a spray paint trigger grip. Believe me, if you’re working on any big spray paint project, get the trigger grip! Your fingers will thank you!
I also used some cheap duct tape, and packing paper, both of which I already had lying around the house, to block off the inside of my crates. I’m sure other types of tape and something like old newspapers would work just as well. I spray-painted my crates outside in the yard, over a large piece of cardboard. Other than the stuff I already mentioned, the only other things you’d need would be your actual crate, and any additional decorative items you want to add!
Prepping The Crates
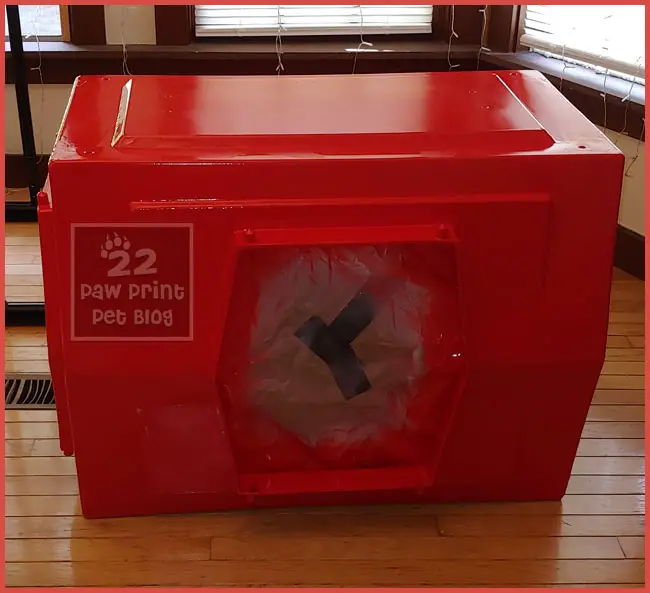
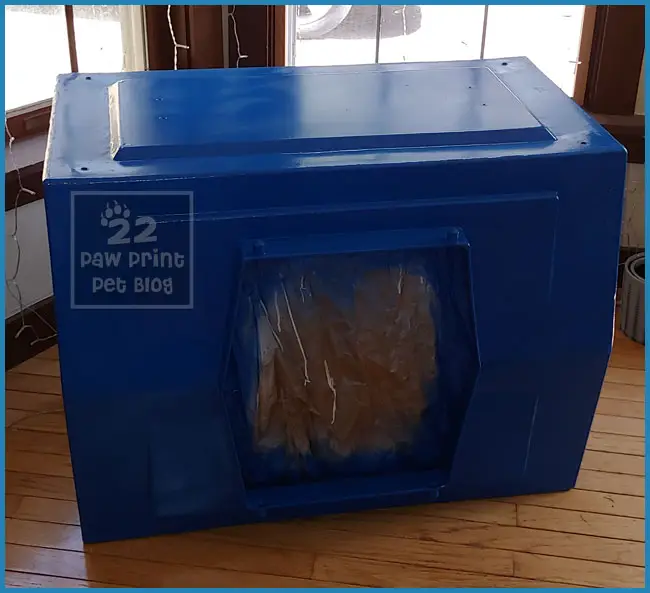
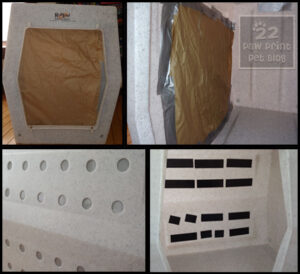 Step 1 for me was washing down my crates, then using duct tape and some old packing paper to close off the inside. I personally felt like there was no reason to paint the inside of the crates. I figured that Kit and Fen scratching at the inside of their crates would damage the paint over time, and potentially expose them to paint chips. Plus, it saved me some money because I probably would have had to buy twice the amount of paint if I wanted to do the insides too.
I played around with the idea of sanding the crates, in hopes that it might make the paint stick better. But in the end I just couldn’t bring myself to take sand paper to brand new, expensive, dog crates, so I didn’t do it.
Probably the most annoying part of prep was waiting for the weather to actually cooperate with me! Because I knew painting the crates would be a multistep process, I had to wait for a span of at least a couple of days in a row with nice, rain free, weather.
Time To Paint (Finally)!
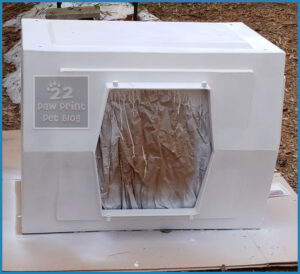 Once mother nature decided to cooperate, it was time to get painting! I started by priming my crates with white primer. To be honest, if I was doing this project again, I think I might strongly consider skipping this step. At least if I was working with another light colored crate.
I did one coat of primer and, once that was dry, started in on my colors. I have to admit, I’m not the best at spray-painting, and tend to be too heavy-handed. But I did my best. I did two coats of the colored paint, allowing the paint to fully dry in between coats. I didn’t paint the insides of my crates (as explained above), or the bottoms. Then I finished off by adding a single layer of top coat. In my opinion, the top coat didn’t seem to make a huge difference. If you’re looking to save on time, or money on paint, I don’t think my project would have turned out all that differently if I had skipped using the primer and top coat.
When I was finished, I left my crates to dry for a really long time. I wanted to be 100% extra sure that the paint was fully dry and fume free. I left our crates outside as long as possible, then moved them into our shed. All in all, I ended up allowing our newly painted crates to sit for around a month each before I even thought about letting the dogs near them. Waiting that long was overkill for sure, but my dogs had other crates to use in the meantime, so I wasn’t in any rush.
And Just Like That, We Had Custom Crates!
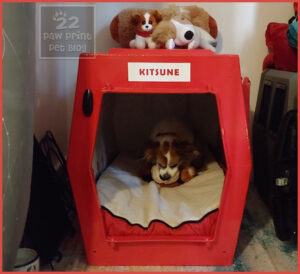 I added the command hooks that I mentioned above on the front of our crates, near the door. I don’t like crating my dogs with their collars on. On the rare occasion when I actually close them up in their crates, I take their collars off and hang them up on the hooks.
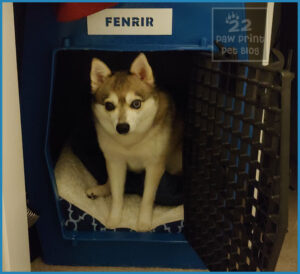
The only other thing I added was my dogs’ names to the top of the crates. My partner was very sweet and made me stencils of the boys’ names. I was originally going to use the stencils to paint their names with black paint. Being the weirdo that I am, I decided that I actually liked how the stencils looked attached directly to the crates. I figured I can always update this later if I want to change up the look.
So How Have They Held Up?
As I mentioned above, Kit’s (the red crate) was painted in the summer of 2020 and Fen’s (the blue one) was done in the spring of 2021. I’d say they’ve held up really well so far! However, I do want to point out that we use these as indoor crates. They pretty much sit in one spot in our house. I don’t move them very often, and we don’t use them for travel. We did move with them last fall. Because the crates are too big for our car, we had movers move them to the new house for us.
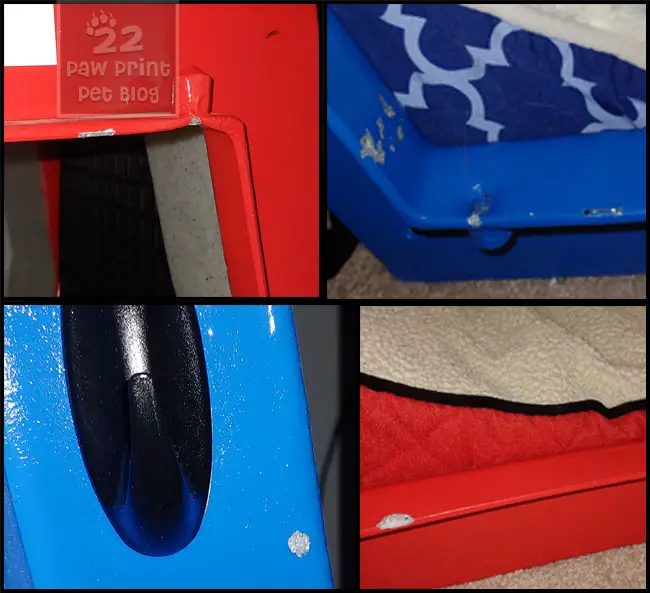
I’ll admit that the paint was a bit damaged in a few spots during the move. It wasn’t anything super major, but Kit’s crate especially has some scuff marks and small spots where the paint was scraped off during the move. I’ve also noticed a few chips in the paint that wasn’t a result of the move. These almost exclusively happened around the doors of the crates.
I’m eventually planning on touching up at least a few of the chips. I probably won’t bother touching up too much around the doors, but figure it will be easy to fix a few of the other, minor, chips.
What Would I do Differently Now?
 Knowing what I know now, if I were to do a project like this again, there are a few things I would do differently. Like I mentioned above, I would strongly consider skipping using primer and the top coat. The colors I selected were vibrant, and the crates were already a light color. I think I would have gotten good coverage without using a primer, which would have saved me a bit of money and, more importantly, time. I didn’t notice a huge difference in the appearance of the crates after I applied the top coat, and I don’t feel like it did a lot to protect the paint.
I’d also not bother painting the inside lip around the doors of the crate. While I do think this area looks better painted, it’s also the area where I’ve experienced the most chipping/damage to the paint. In addition, I’d probably try sanding the crates, at least a bit, before painting them. I’d be curious o see if that would help the paint stick better, and maybe reduce the number of scratches and chips.
Not necessarily something I’d do differently, but I’ll add that I’m not sure if I feel like this project would be worth it for a crate that gets moved around a lot. For an indoor crate, that rarely ever gets moved (like ours!), the paint holds up well. But I’ve noticed that the paint does scratch/scuff pretty easily if it’s accidentally scraped up against another surface. If you have a travel crate that you’re constantly taking in and out of your car, or just otherwise moving around a lot, I strongly suspect the paint would show a lot of damage in a short time.
What do you think!?
Do you like how our crates turned out? Would you ever try a project like this yourself? If anyone has any questions about the process, or anything else, please feel free to ask in the comments below! I’ll do my best to reply ASAP, and will update this post in the future after we’ve used our painted Ruff Lands crates for longer!

8 Comments
[…] 19. Catscue 20. Friends Furever 21. It’s a Snap! 22. Golch Central 23. Colletta’s Kitchen 24. Friendship Friday 25. Layla’s Woof 26. Canadian Nana 27. Paw Print […]
The crates turned out great! The chipping isn’t too bad but like you said you can do a touch-up with the paint. This is a great DIY project and saves you a lot of money instead of buying new crates. It’s a nice way to personalize them and color them the way you want. Well done!
Thanks! Yeah, the chipping isn’t super noticeable honestly. I zoomed into the chips for the photos. They are not too noticeable when you’re looking at the crates in real life. I do think I’ll eventually touch at least some of them up, but I’m not in any rush.
What a fabulous idea! I wonder if you used a marine-grade varnish as your topcoat if that would prevent chipping so much? That stuff is supposed to be made to withstand severe water storms and adheres fairly well. Or maybe even an epoxy sealer would prevent chipping? Of course, I’m not sure about how pet-friend either are, but if you don’t paint the inside it may work. I’m now curious. Hmmm…
I do love the look of what you did, especially with the command hook and stencil names. Awesome idea! 💖
They look amazing and so smart, good for you for painting them. I am sure through wear and tear they would chip also if you had bought them in colors, it happens. I love their names on them too, very snazzy
What a great job you did–the dog crates look wonderful.
How brilliant! They look fantastic and it’s great to know they held up so well. When I had my FiveSibes, their crates were kept in one room (they had their own room with a/c, fans, even a TV!) Oh, I would have loved to done this with them! Pinning to share this great idea!
[…] Painting Ruff Land (And Other Plastic) Dog Crates […]